|
|
Dates |
|
Event |
1946 |
|
Constructed as a F-24W-46. |
1946 |
|
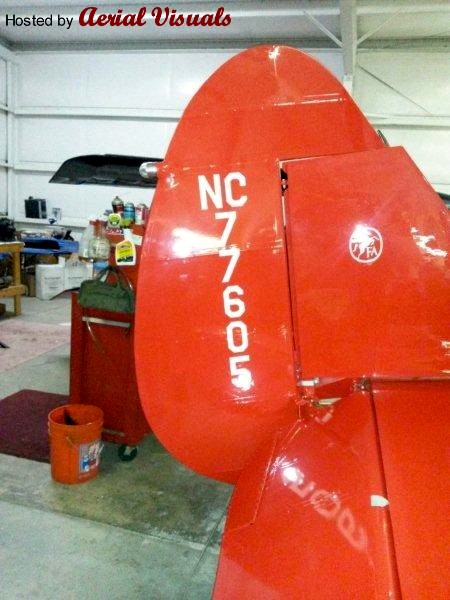
To University of California, ??? Campus with new c/r NC77605.
Brad Donner commented (5 May 2014): Delivered new and outfitted for mapping work. One of her few custom features was she was equipped with both an artificial horizon AND a directional gyro.
Your Assistance is Needed: Which campus of U of C took charge of the airframe? Please share any information you may have with Aerial Visuals.
 Share Your Information with Everyone by Editting the Documented History Share Your Information with Everyone by Editting the Documented History |
28 January 1959 |
|
Certificate of airworthiness for N77605 (24W-46, W46-305) issued. |
Circa 1963 |
|
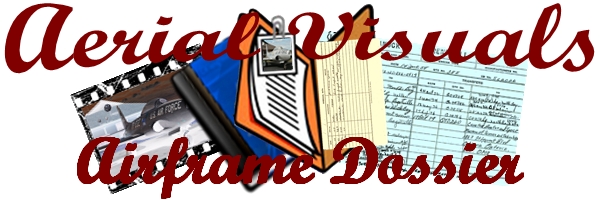
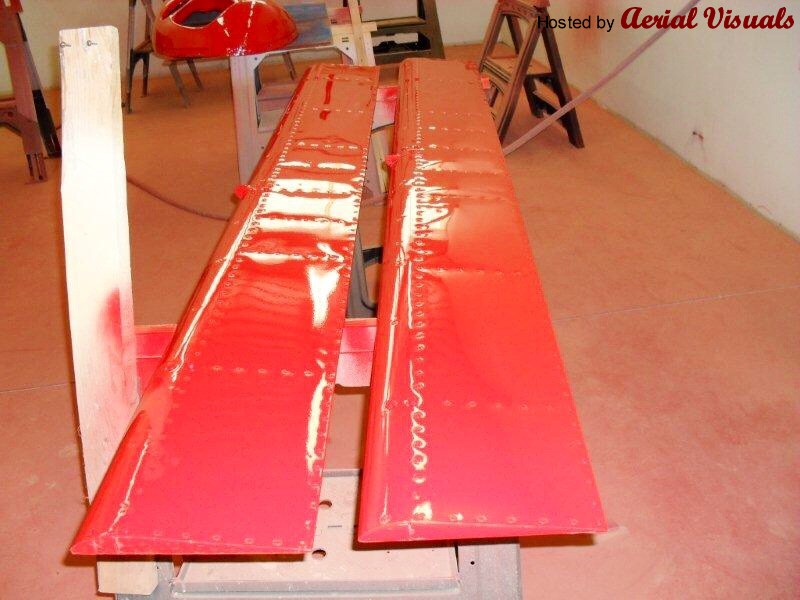
Photographer: Scott Gupton
Notes: The 1963 restoration was conducted in Torrance California at a hangar known as the Bellanca shop. Here are the tail surfaces getting recovered. |
Circa 1963 |
|

Photographer: Scott Gupton
Notes: Another picture of the 1963 rebuild. From the pictures and log entries, the scope of this rebuild appeared to be new fabric, new paint, new interior, installation of an overhauled engine, and installation of a new Aeromatic propeller. There is no documentation of damage being repaired, nor is there documentation of extensive woodwork during this rebuild. |
|
|
To Chuck Gupton with new c/r N77605. |
1963 |
|
To Charles Gupton.
Brad Donner commented (August 2014): Charles Gupton (born November 12 1927, died April 19, 1997) was a B-24 ball turret gunner during WWII. He acquired NC77605 as a project in 1963 and spent nearly two years rebuilding the airplane. Chucks wife Ethel christened the airplane Dumbo following its rebuild with a feather from her hat (back in the day when ladies wore hats). |
From Circa 1963 to Circa 1965 |
|
Restoration started.
Markings Applied: Dumbo
The plane was named Dumbo for the main character of a Dinsey animated film released in 1941. The hero of the story was a young elephant named Dumbo who was teased for his large ears. Dumbo surprised everyone when he showed he could use his ears to fly. An appropriate name for an airplane indeed!. |
Circa 1965 |
|
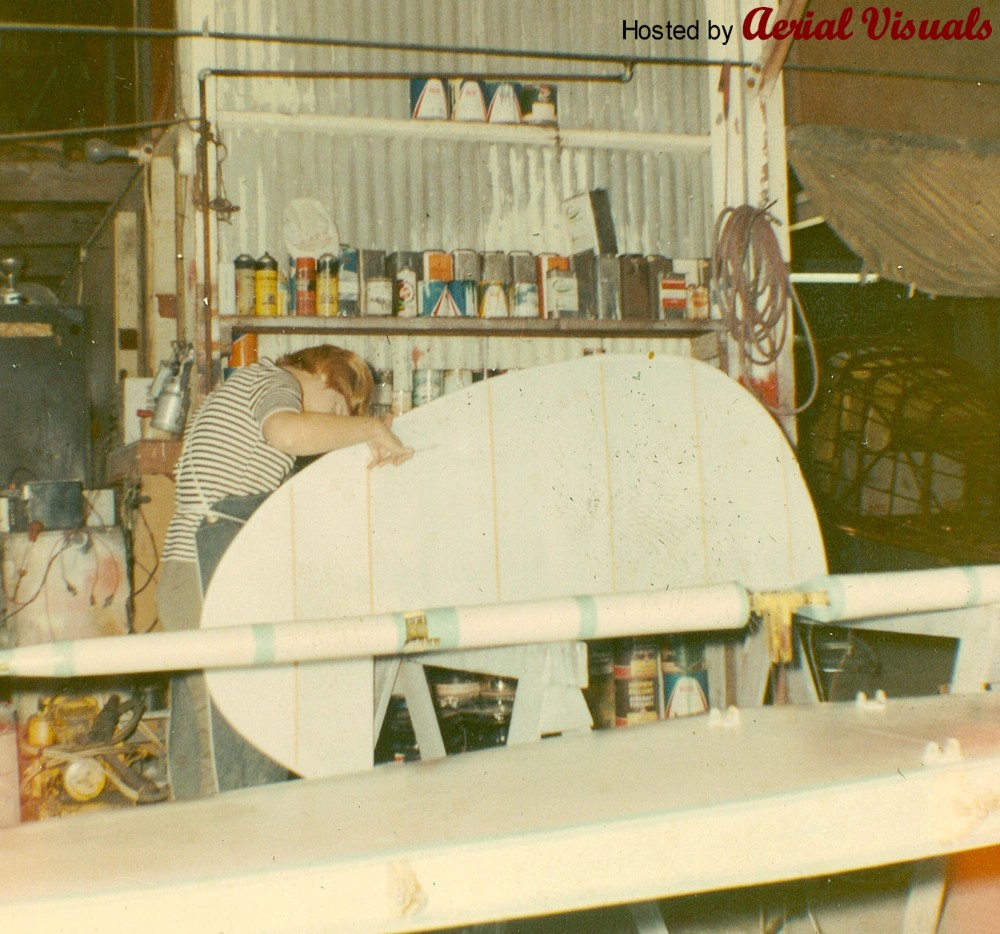
Withdrawn from use.
Photographer: Scott Gupton
Notes: Here is Scott Gupton, son of previous owner Chuck Gupton, with NC77605 on the ramp at Long Beach, CA in 1965. As you can see, Long Beach airport has changed a bit since 1965. |
Circa 1965 |
|

Photographer: Scott Gupton
Notes: Chuck Gupton (on the right) and family friend Bob Mendoza, who was instrumental in the final assembly of NC77605 following the Gupton restoration in the early 1960s. |
Circa 1965 |
|
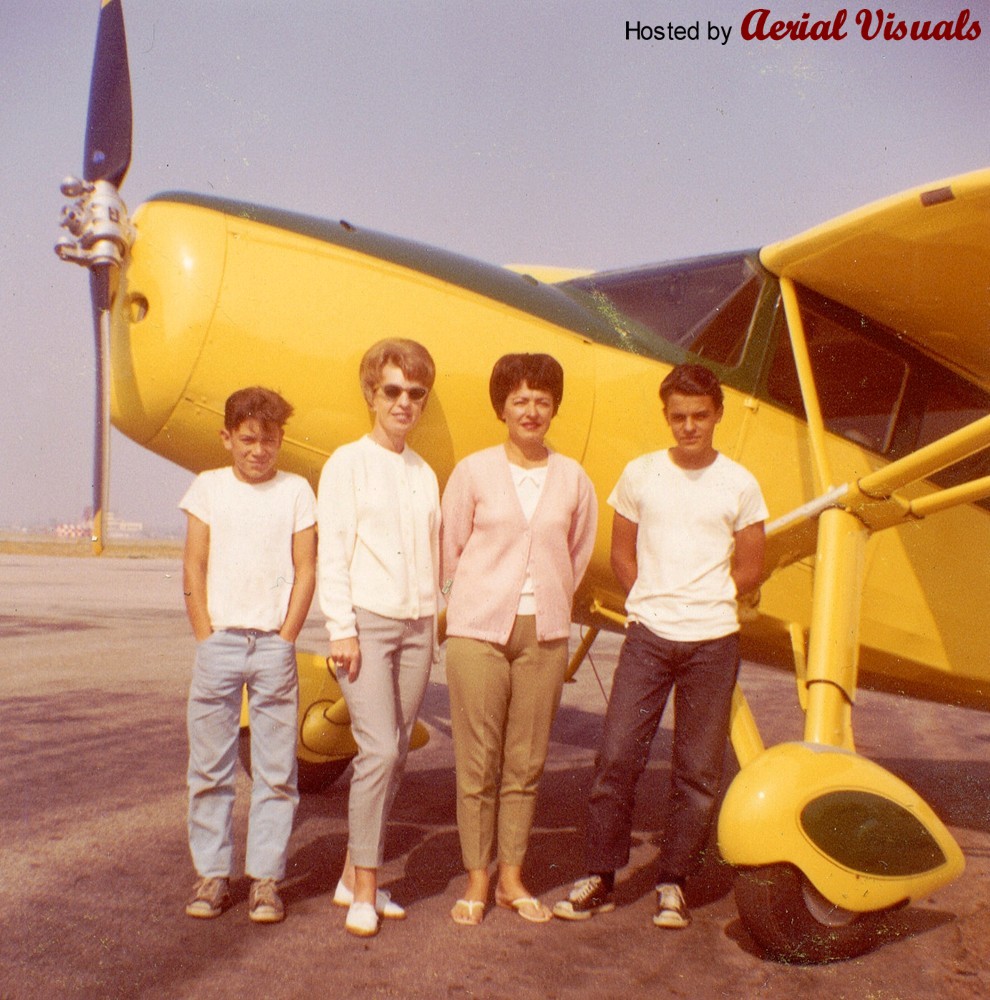
Photographer: Scott Gupton
Notes: The Mendoza and Gupton families. From left to right. Bob Mendozas son Mike and his wife Suzie. Chuck Guptons wife Ethel and son Scott. |
Circa 1965 |
|
Photographer: Scott Gupton
Notes: Scott and Valerie Gupton |
Circa 1965 |
|

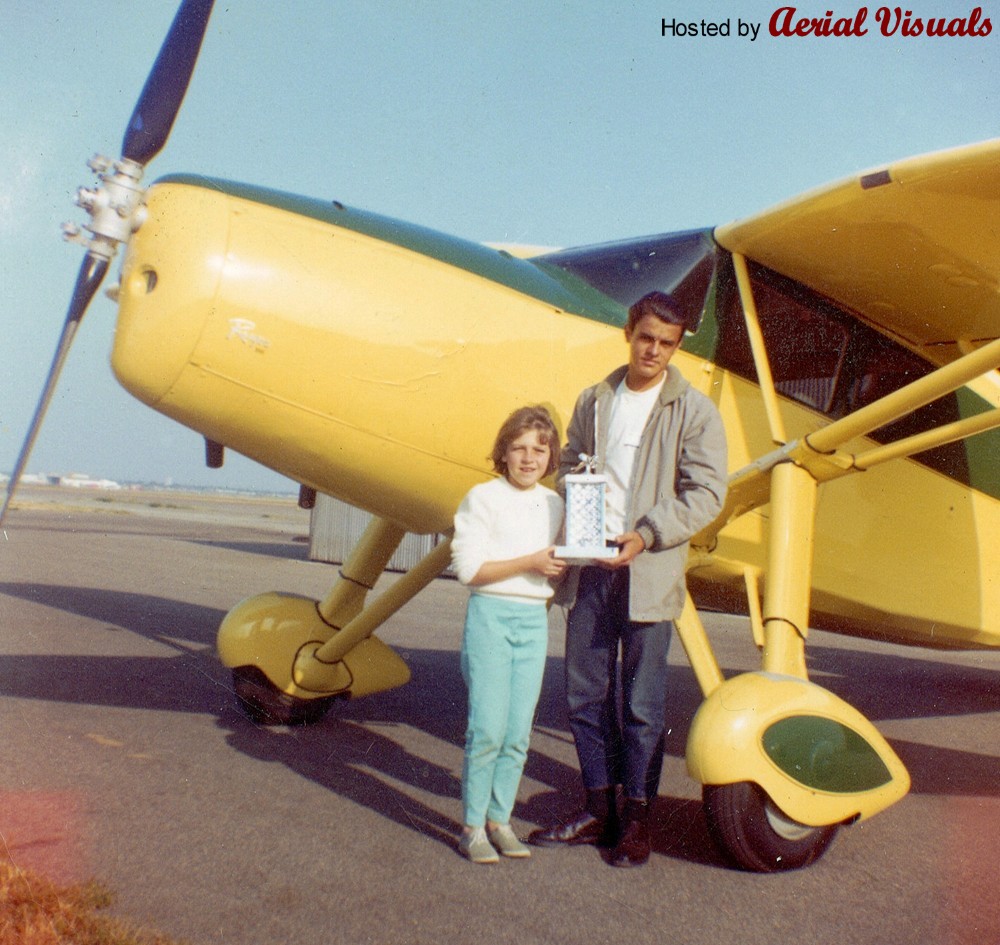
Photographer: Scott Gupton
Notes: Chuck Gupton with one of the many trophies he won with NC77605. This one was at Merced, CA. Richard Bachs Detroit Parks biplane can be seen in the background. |
Circa 1965 |
|

Photographer: Scott Gupton
Notes: Here is Chuck Gupton with his back to the camera, Richard Bach in leather jacket facing the camera. Richards wife Betty Bach is in the sleeping back under the wing of Richards Detroit Parks biplane. |
Circa 1967 |
|

Photographer: Scott Gupton
Notes: NC77605 looking sharp on the Long Beach ramp. The quality of the old cotton and dope finishes was extraordinary when it was done right. These pictures, when viewed in high resolution, show amazing color and detail. Many thanks to Scott Gupton for sharing them. |
29 June 2001 |
|
Photographer: Brad Donner
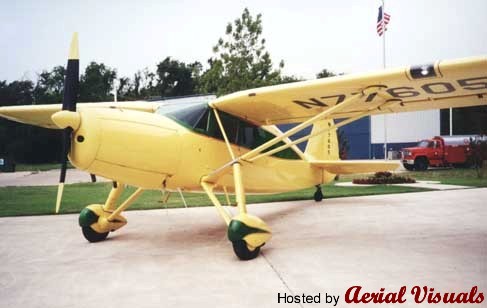
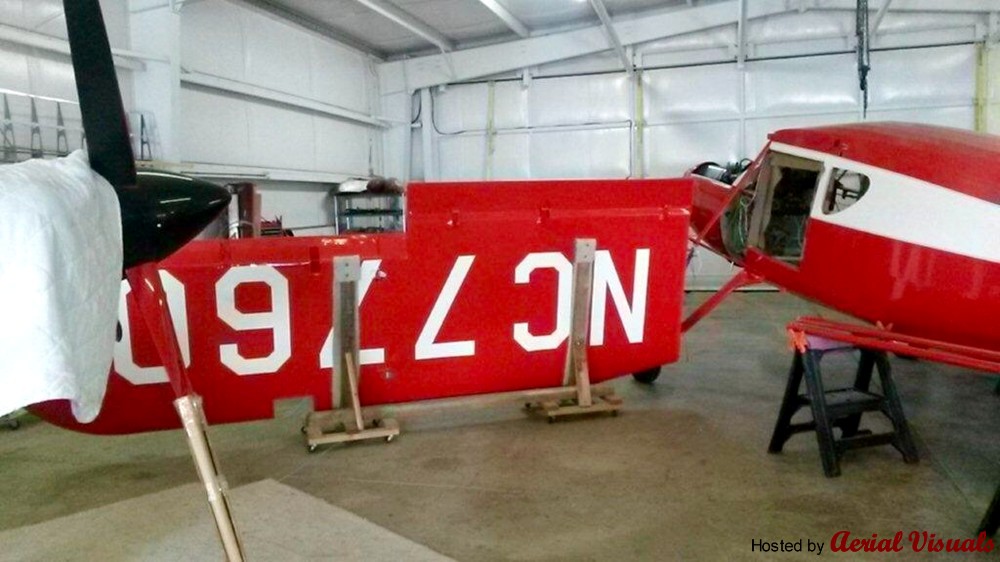
Notes: Fred before he stopped flying. This picture was taken at Aero Country Airport in McKinney, TX (T-31) after an annual inspection. The airplane changed hands a few times between the late 1980s and my acquisition of it in 2004. As best I can tell, the airplane was never recovered after the 1963 Gupton rebuild in California, but it was repainted. Compare this image with the images taken in the 1960s and note the different trim configuration, particularly on the cowling and wheel pants. A previous owner had also swapped the Aeromatic F220 propeller out for a Flottorp propeller. I had the Aeromatic rebuilt and have retained the Flottorp as a spare. The airplane looks good in this picture, but it was in need of a rebuild. The fabric and paint were showing their age, the interior was badly worn, and some of the internal woodwork was deteriorating. It was time... |
24 March 2004 |
|
To Brad D. Donner, Hurst, TX with new c/r N77605.
Brad Donner commented (1 May 2014): I bought the airplane as a project in 2004. It had been flying until approximately 2001, but was badly in need of a complete restoration. The previous owner had placed it with a small shop who began the restoration, but was unable to see the project through. The airplane is currently about 80 done and should be attending some antique airplane venues in 2015. It was converted to Ranger power very early in its life and I have elected to keep it Ranger powered. It will be finished in red and Diana Creme in the traditional Lowry paint scheme and will include an authentic interior and an Aeromatic prop. This same airplane was a prominent fixture on the West Coast antique airplane circuit in the 1960s when it was owned by Charles Chuck Gupton. Interestingly, Mr. Gupton was friends with aviation author Richard Bach and Guptons son Scott has provided me with a number of pictures showing N77605 in the company of Richard Bachs Detroit Parks biplane. Aviation is indeed a small world!. |
Circa 10 October 2005 |
|

Photographer: Brad Donner
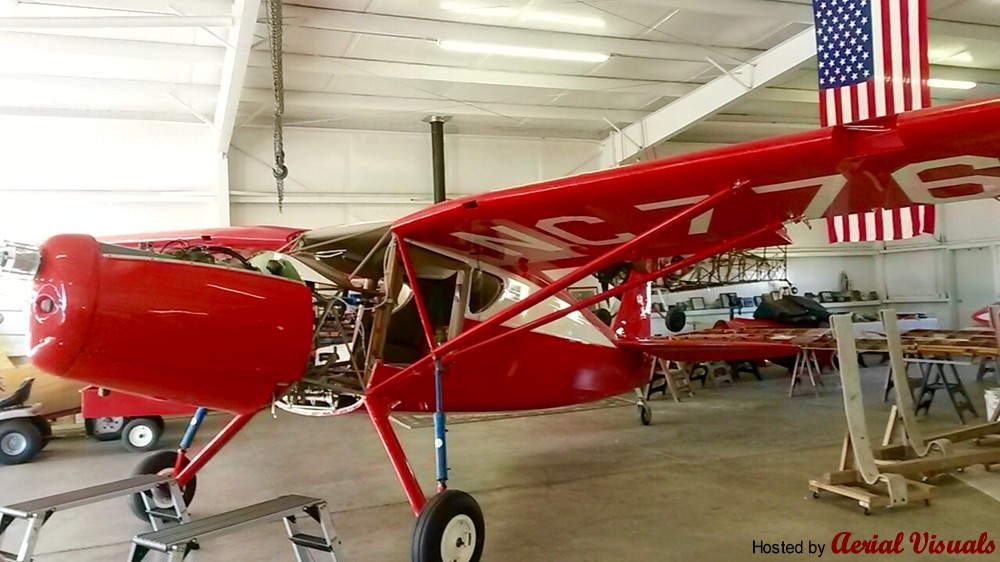
Notes: Here is how I found NC77605. Wings and fuselage uncovered, major components inspected and found to be relatively sound. The good news about this airplane was that it was built in the Temco plant in Texas, which was not far from my current home; it had all its logs back to the day it was new; it had no major damage history; it had a unique history on the west coast antique airplane circuit in the 1960s; and all the major components of the airplane were present and in fairly good condition. The bad news about this airplane was that the previous owner had placed it with a small shop in Oklahoma who was unable to see the project through to completion and did not share my vision regarding quality and authenticity. Now for the REALLY GOOD NEWS! In 2012, Jamie Treat of Elbert, Colorado took over the project. Jamie has done a number of F-24 projects and all were finished to the highest standards of quality. I have been very fortunate in finding Jamie and his shop. |
|
|
Restoration continued. |
29 July 2013 |
|

Photographer: Brad Donner
Notes: Belly formers after varnish and just prior to installation on the fuselage. |
29 July 2013 |
|

Photographer: Brad Donner
Notes: An overview of the former and stringer configuration viewed from the left side of the fuselage. |
30 July 2013 |
|

Photographer: Brad Donner
Notes: An earlier trial fit and rig of the tail surfaces. |
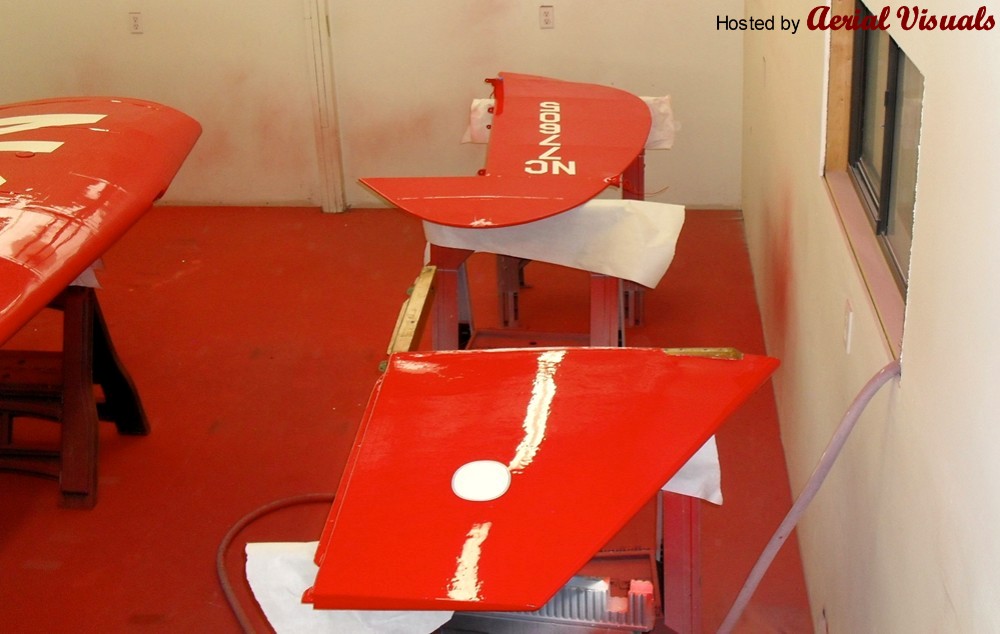
Circa 10 September 2013 |
|

Photographer: Brad Donner
Notes: A closeup of the trailing edge of one wing showing off the cove for the split flap. This cove is a very labor intense bit of wood and fabric work. |
12 September 2013 |
|
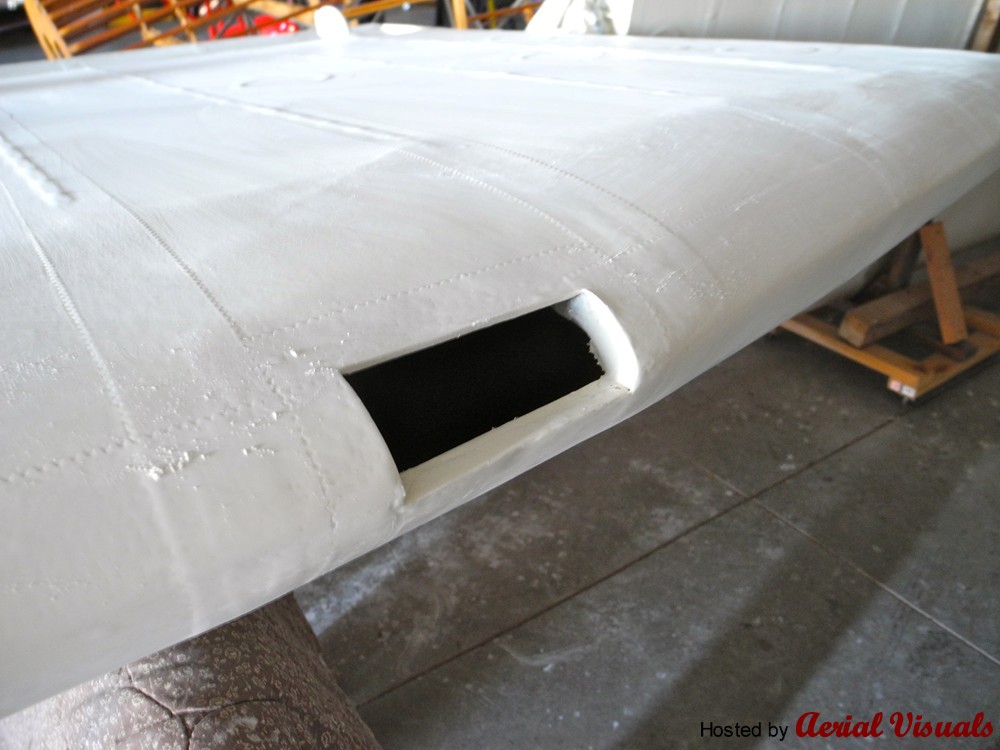
Photographer: Brad Donner
Notes: Another fun day of wet sanding. Here you can see the inlet for the cabin air vents. This opening is a lot more elaborate than it looks. The leading edges of the wings are mahogany. This opening, which has a screen cover once its finished, creates an air plenum which is formed by the inside of the leading edge skin and the front face of the forward spar. There is a solid nose rib just outboard of the opening to prevent air from moving outboard of the opening. The air is routed through this wooden plenum to registers in the roof of the cabin just above the windshield frame. These registers are adjustable through a small plunger that moves a vane to modulate the amount of air coming into the cabin - remember, this was before the invention of the eyeball or Wemac vent. True to all things Fairchild - it is elaborate, has a high parts count, and is labor intensive to get right. But all worth it in the end. |
13 September 2013 |
|
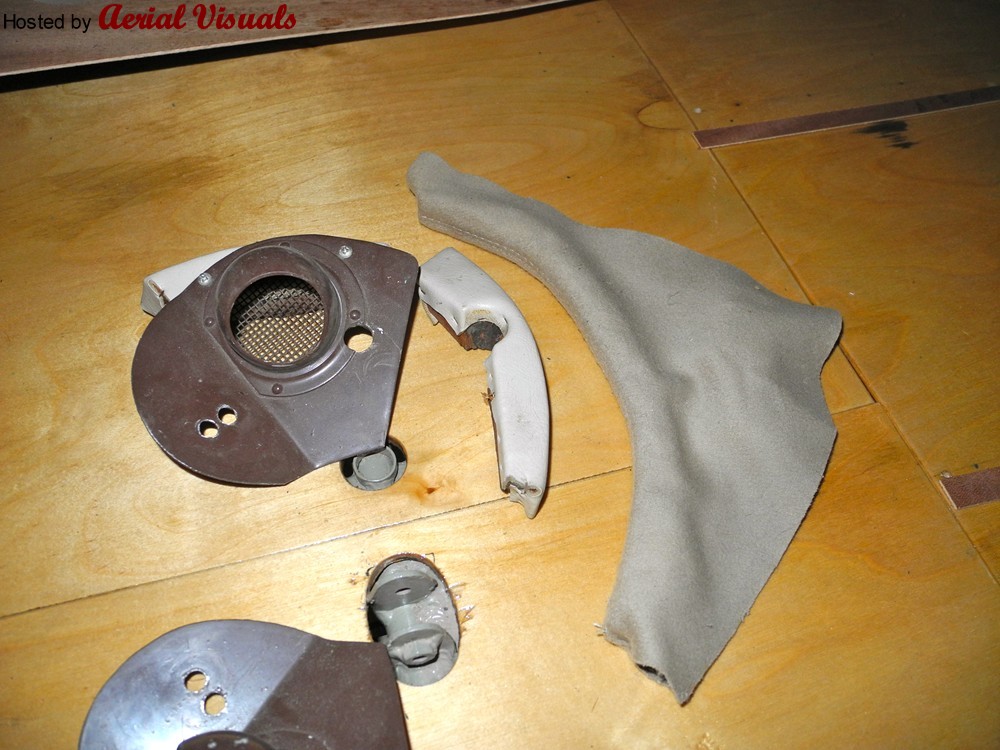
Photographer: Brad Donner
Notes: Detail shot of the cabin air registers. Here you can see the vent itself and the frame pieces that surround it. The frame pieces are spruce that has been varnished and then covered with mohair upholstery. |
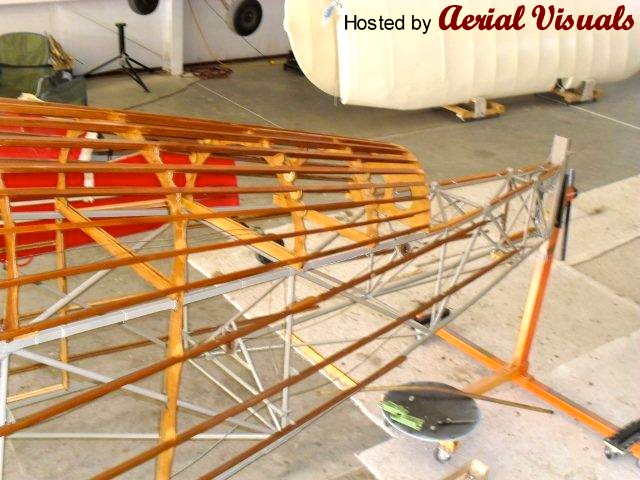
14 September 2013 |
|

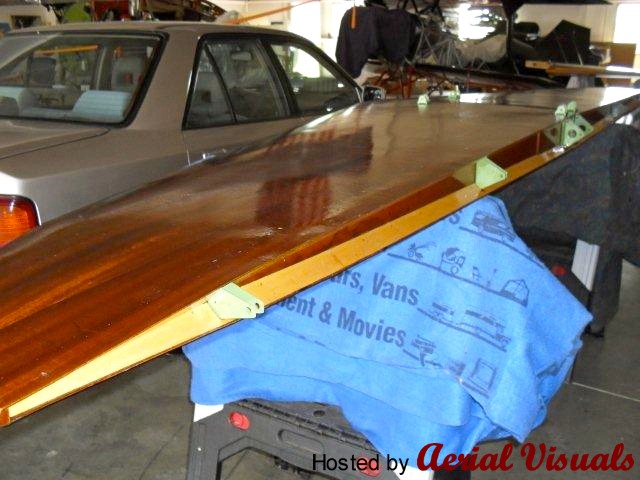
Photographer: Brad Donner
Notes: The turtle deck, or top of the fuselage. The F-24 fuselage structure is welded steel tubing. The fuselage curvature is the result of an elaborate former and stringer assembly attached to the top, side, and bottom of the welded steel tubing structure. The top part of this assembly is VEERRRRYYYY elaborate and takes many labor hours and a giant mound of expensive sawdust to create. Here it is between coats of varnish. |
Circa 20 September 2013 |
|

Photographer: Brad Donner
Notes: My fingers are blistered, my back hurts, the hangar floor is a mess! I have just wet sanded every square inch of Freds wings to get them smooth as glass. Here they are in the early morning light with the inspection covers installed. |
16 October 2013 |
|
Photographer: Jamie Treat
Notes: Aft fuselage wood work looking very nice. |
16 October 2013 |
|
Photographer: Jamie Treat
Notes: Horizontal stabilizer ready for fabric. |
16 October 2013 |
|

Photographer: Brad Donner
Notes: Authentic interior with the exception of temper foam padding in the seats and a modern intercom system. |
16 October 2013 |
|

Photographer: Brad Donner
Notes: Nice finishing touches on the headliner |
16 October 2013 |
|

Photographer: Jamie Treat
Notes: Detail work on assist straps. |
16 October 2013 |
|

Photographer: Brad Donner
Notes: Belly stringers and elevator torque tube. All bearings, pulleys, and cables are new. |
Circa October 2013 |
|
Photographer: Brad Donner
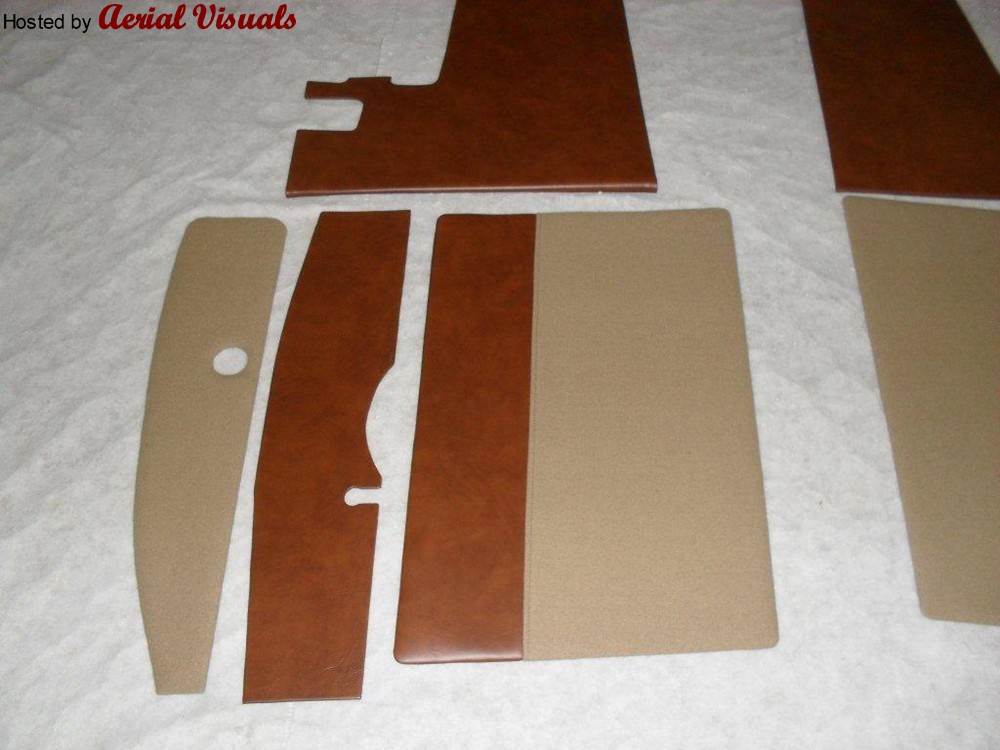
Notes: More interior components. These are the door panels below the window sill, the side panel below the door opening, the cover for the butt rib over the door opening (note the hole for the fuel gage), and a side kick panel that goes forward of the door and below the side of the windshield (note the cutout for the fuel valve). The dark brown is leather stretched over aircraft plywood (four ply mahogany - I think) with a backing material. The lighter material is mohair - also stretched over plywood with a backing material. The colors and materials are accurate per the 1946 blueprints and brochures. |
10 June 2014 |
|
Photographer: Brad Donner
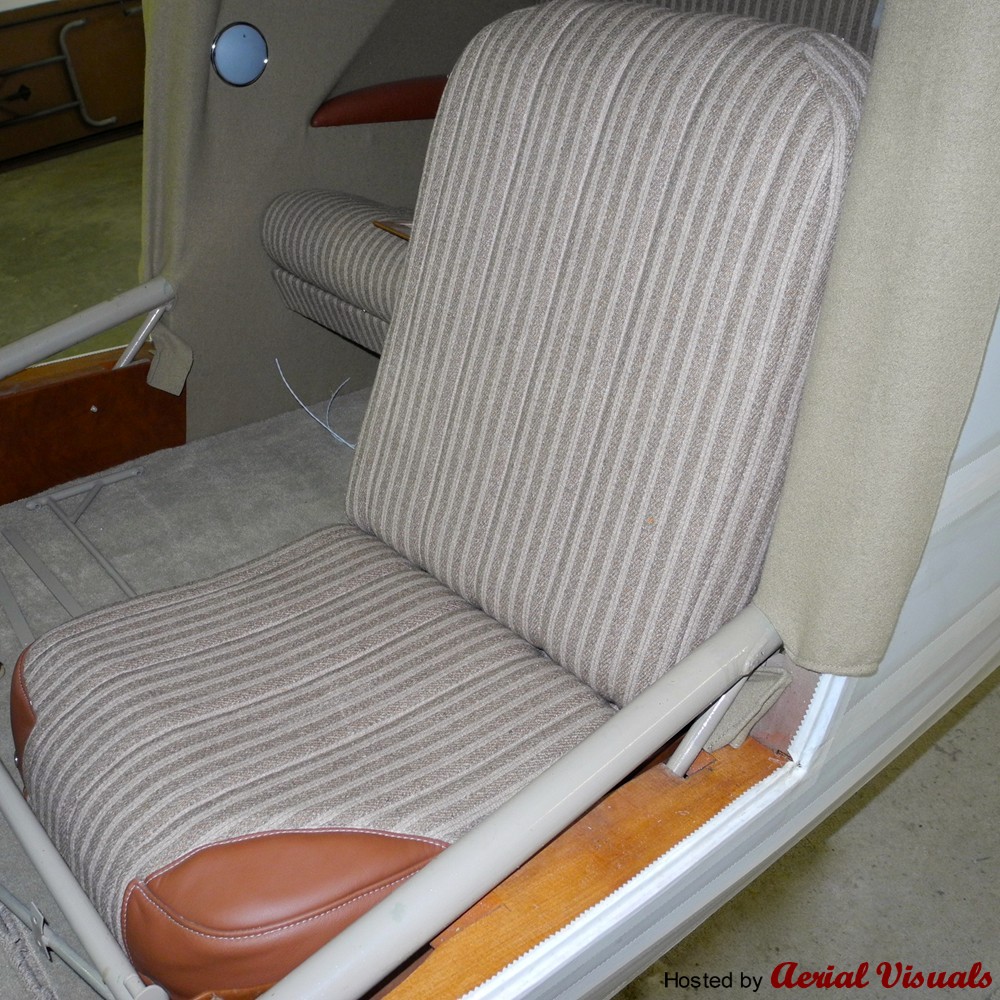
Notes: The pilot seat in the cockpit. The factory only offered one interior for the 1946 model year and this is an accurate duplication of it. |
10 June 2014 |
|
Photographer: Brad Donner
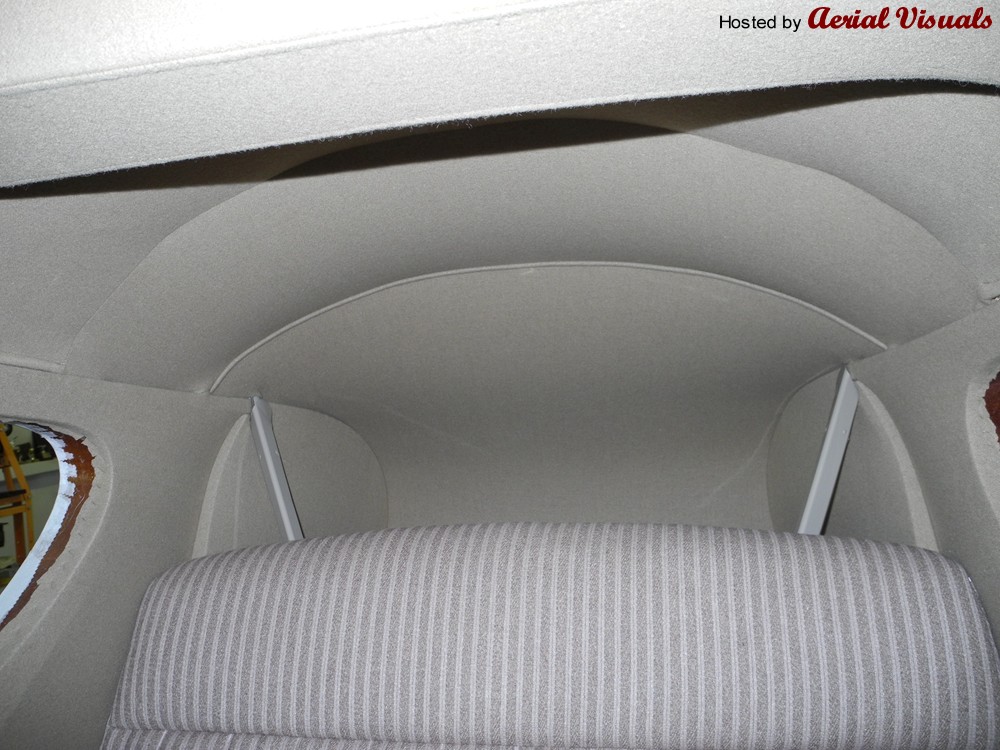
Notes: Nice detail work on the mohair headliner. If you use the original pattern and installation method, the headliner has to be installed before the fuselage gets covered, which makes for some demanding masking and protective measures when it is time to prime and paint the fuselage. But all worth it! The detail work on this installation is incredibly intricate and photos do not do it justice. |
10 June 2014 |
|

Photographer: Jamie Treat
Notes: This red is a slight variation of the factory red. Finish is AirTech with lots of sanding after prime and a little sanding between finish coats for a very clean finish. The trim color is slightly whiter than the factory Diana Creme, but very close. Paint scheme will be original. |
10 June 2014 |
|

Photographer: Jamie Treat
Notes: Stabilizers and control surfaces turning red. Fred got his name when I decided to buy him a playmate. The next F-24R project is just a few serial numbers away from Fred and since they are both old and a bit frumpy looking (and since I like old sitcoms), they are named Fred and Ethel after the characters of the same name in I Love Lucy. Stay tuned, more on Ethel later... |
July 2014 |
|
Brad Donner reports (Summer 2014): The restoration continues to make good progress. The airplane is in the paint booth, one major component at a time, and is turning very, very red. The Aeromatic prop is nearly ready for installation and looks fantastic - the blades are being finished to match the airplanes trim color. The interior pretty much speaks for itself - authentic fabrics and colors and a very high quality installation with lots of attention to detail. We are still on track to test fly some time in 2015 and make some of the antique airplane venues that year. |
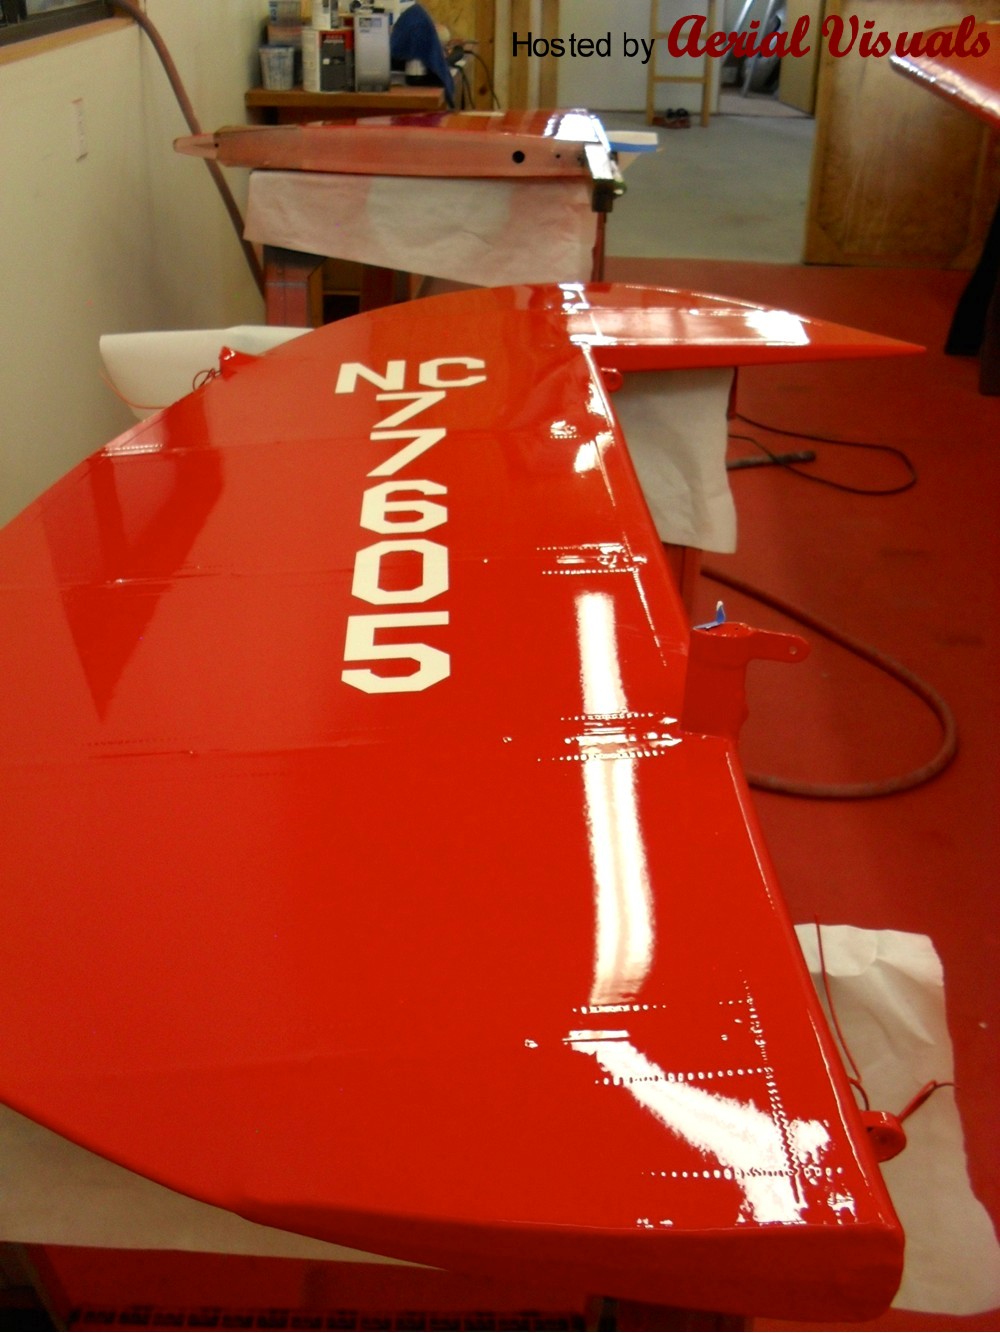
25 July 2014 |
|

Photographer: Jamie Treat
Notes: Original NC registration numbers going on the wings. |
25 July 2014 |
|

Photographer: Jamie Treat
Notes: Yes, those are BIG registration numbers. 30 inches tall per the factory drawings - there is also a slight extra space between the C in the NC and the numbers. I have no idea why they did that, but they did - it is in the drawings and can be seen in photographs of airplanes at the factory. |
25 July 2014 |
|
Photographer: Jamie Treat
Notes: Excellent detail work here. The paint is thick enough to have that deep finish look, but not so thick that you can not see the tapes and the weave of the fabric. |
25 July 2014 |
|
Photographer: Jamie Treat
Notes: Overview of the rudder and vertical fin. The Fairchild logo will get airbrushed onto the white oval on the vertical fin. |
25 July 2014 |
|

Photographer: Jamie Treat
Notes: Kudos to craftsman Jamie Treat and the stencil shop - will credit their proper name later - for their incredible attention to detail on the factory logo. This is a closeup of the vertical fin, the logo is also on the entry steps, a few of the instruments, and on the Aeromatic prop. With a little luck, Freds playmate Ethel will not be terribly far behind :-) |
30 July 2014 |
|

Photographer: Jamie Treat
Notes: Yes, it is quite the billboard. The right wing curing. |
30 July 2014 |
|

Photographer: Jamie Treat
Notes: Final preparation of the nose bowl before prime and paint. These are very intricate pieces and I am fortunate that mine is in good condition for its age. |
30 July 2014 |
|

Photographer: Jamie Treat
Notes: Top cowl getting ready for prime and paint. |
30 July 2014 |
|

Photographer: Jamie Treat
Notes: Struts primed and ready for finish color. |
|
|

Photographer: Brad Donner |
|
|
Photographer: Brad Donner |
|
|

Photographer: Brad Donner |
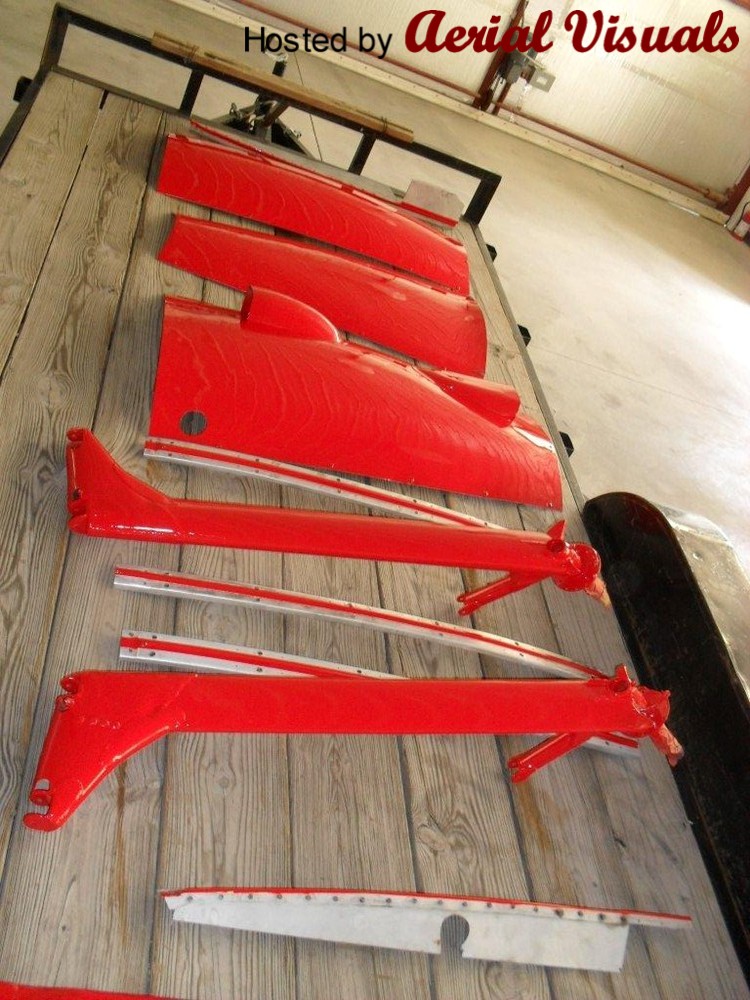
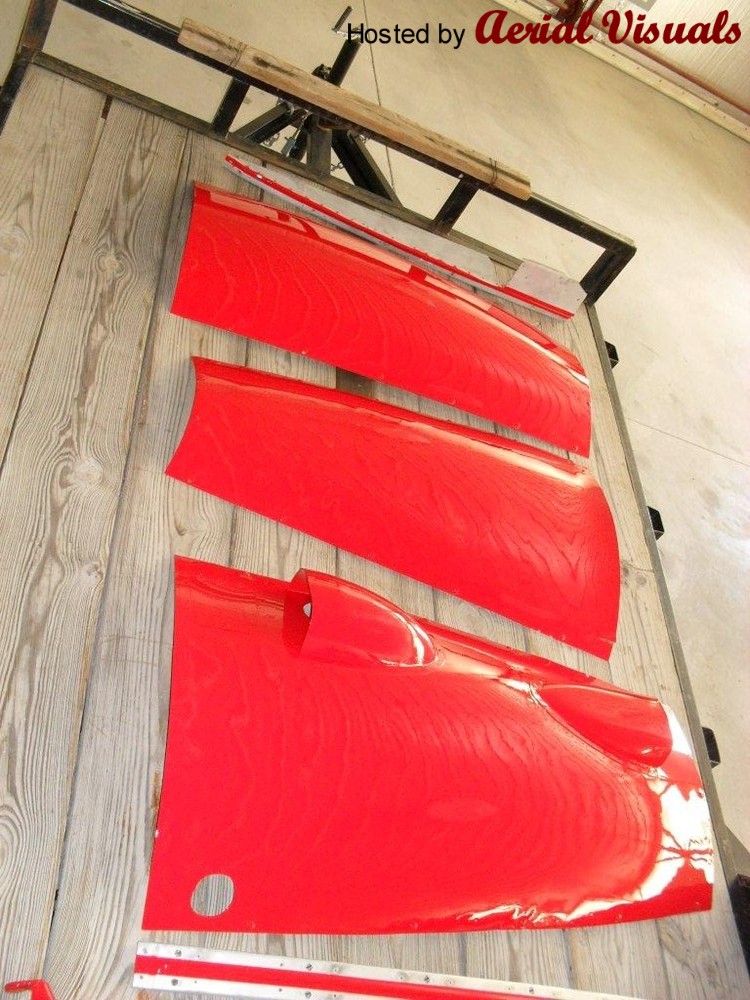
10 August 2014 |
|
Photographer: Jamie Treat
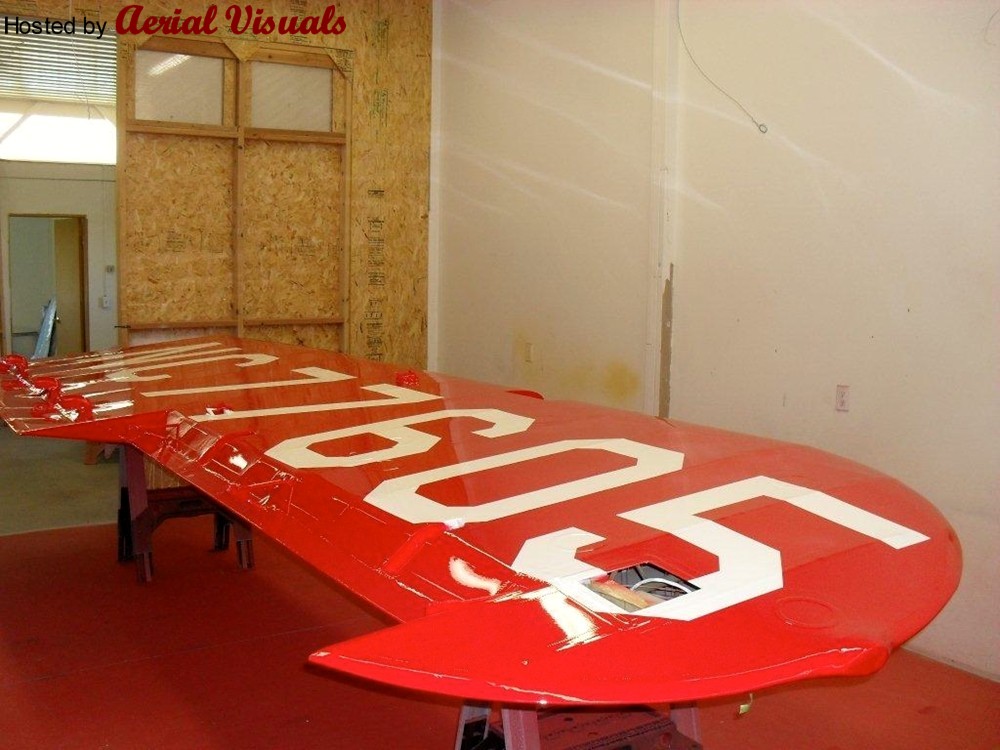
Notes: Some very large wings! Exactly per the factory drawings, the registration number goes on the top of the right wing (on the left side of this image) and on the bottom of the left wing. 30 inches tall and with a little space between the C in the NC and the numbers. |
12 August 2014 |
|

Photographer: Jamie Treat
Notes: Small parts turning red. LOTS of prep work goes into the small parts - little dents and holes have to be filled, corrosion addressed, everything has to get checked for fit and alignment before the finish color goes on. Here you can see some of the strut cuffs, the nose bowl, the lip that goes forward of the bottom part of the firewall, and a variety of other small parts getting their first coat of red paint. |
12 August 2014 |
|

Photographer: Jamie Treat
Notes: A wheel pant after the first coat of red paint. The wheel pants will get the factory teardrop trim on their outboard sides during a subsequent paint booth session. |
12 August 2014 |
|

Photographer: Jamie Treat
Notes: The nose bowl turning red. All the prep work visible in an earlier picture has paid off - it is smooth and looks great in red. Jamie has outdone himself with his work on this airplane. |
20 August 2014 |
|
Photographer: Jamie Treat
Notes: Some nice detail work on the entry steps. |
20 August 2014 |
|
Photographer: Jamie Treat
Notes: Flaps turning red. The flaps on the Fairchild are manually operated split flaps and the Fairchild manual describes them as having composite construction. No, they arent fiberglass, they are wood ribs skinned with aluminum. Strange. |
20 August 2014 |
|

Photographer: Jamie Treat
Notes: Here is the template for the trim on the wheel pants. The shape of the wheel pant trim is one of those minutiae subjects that get debated a little too much. There are two sets of post WWII drawings that show the layout of the paint scheme and they show different trim layouts for the wheel pants. This is a compromise between the two layouts. |
22 August 2014 |
|

Photographer: Jamie Treat
Notes: One very pretty finished nose bowl after a successful trial fit to the cowling. FIT IS EVERYTHING. These small parts change shape when they are worked on, so there are many trial fittings and adjustments to make sure it all goes together properly during final assembly. |
28 August 2014 |
|
Photographer: Jamie Treat
Notes: Cowling and gear legs turning red. Because of the high and broad stance of the gear, the fuselage is on a purpose built shop dolly that keeps it at a user friendly working height and stance. The gear goes on towards the end of the final assembly process. |
28 August 2014 |
|
Photographer: Jamie Treat
Notes: Cowling in the drying / curing room. Many thanks to Jamies neighbor in Elbert for the use of his trailer. The paint booth is in a different building than the hangar where the actual restoration is taking place and the trailer enabled the efficient and safe moving of the wings and fuselage between the hangar and the paint booth. |
1 September 2014 |
|

Photographer: Jamie Treat
Notes: The fuselage in the paint booth getting ready for primer. Note the very intricate masking and protective measures for the windshield opening and all the other openings in the fuselage. These are imperative to protect the headliner, which is installed before the fuselage is covered, and the finish quality of the internal woodwork. Many people have commented what a shame it is to cover the amazing woodwork on this airplane with fabric and they are right. |
1 September 2014 |
|
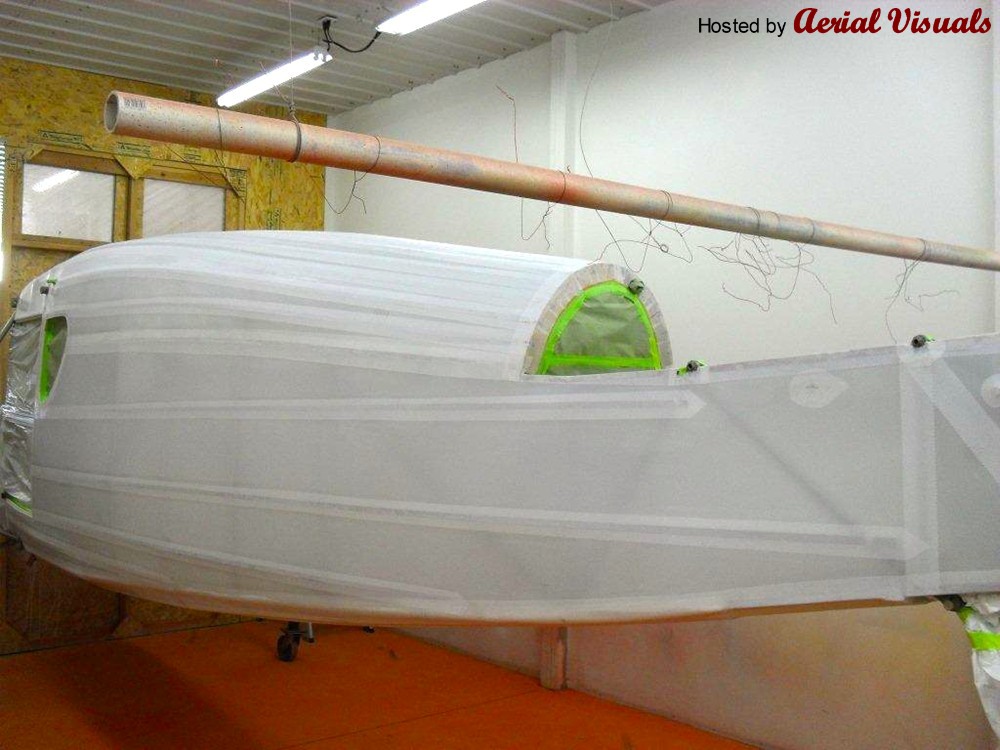
Photographer: Jamie Treat
Notes: More protective measures where the horizontal stabilizer and vertical fin mount to the aft fuselage. Note the precise lines of the fuselage tapes and the absence of a V seam on top of the fuselage. The V seam is sometimes used to accommodate the hump on top of the fuselage but was not used by the factory so it was not incorporated here. |
1 September 2014 |
|
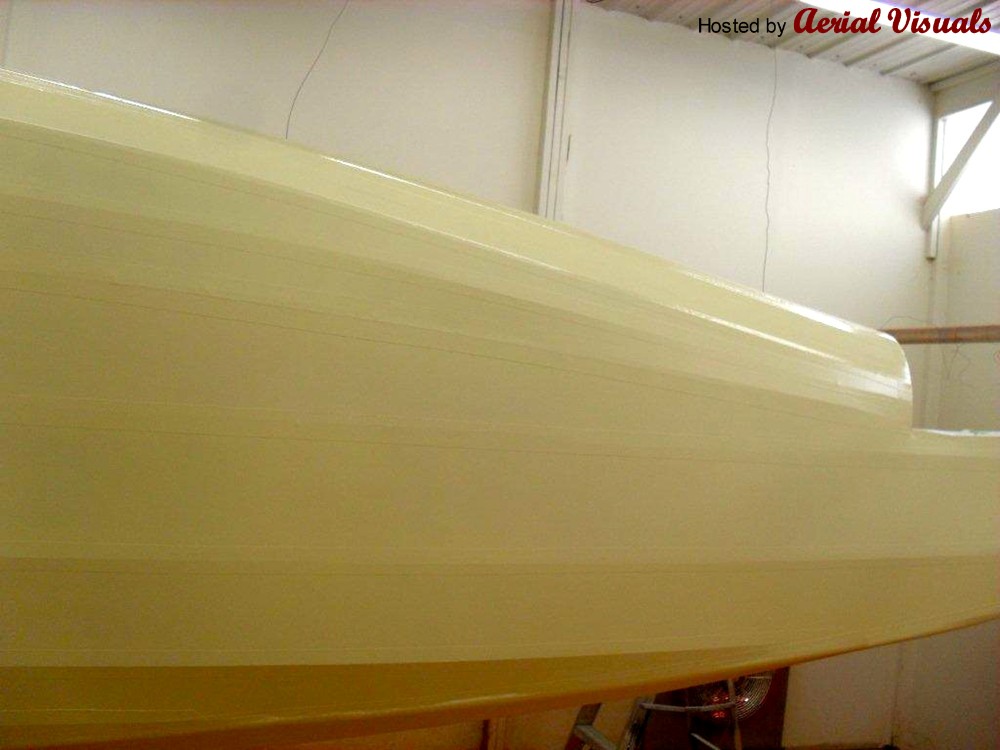
Photographer: Jamie Treat
Notes: The Aerotech primer is a dull beige color that serves as a primer and a UV barrier. Each component gets at least two coats of primer with wet sanding between coats for a smooth finish. |
1 September 2014 |
|

Photographer: Jamie Treat
Notes: Closeup of aft fuselage following the first coat of primer. |
3 September 2014 |
|

Photographer: Jamie Treat
Notes: A dear friend quoting her mother said paint it any color you like, as long as its red. Well, Fred is all that. Heres the fuselage after the first coat of red paint. |
3 September 2014 |
|
Photographer: Jamie Treat
Notes: The factory Lowry trim goes on later - the unique AirTech primer prevents the red from bleeding into the lighter trim color. |
3 September 2014 |
|

Photographer: Jamie Treat
Notes: This is only the first coat and has not been wet sanded or polished in any way but the shine is already evident in the reflection of the step ladder in the aft fuselage paint. |
19 September 2014 |
|

Photographer: Jamie Treat
Notes: Fuselage trim going on. Note the authentic pin stripe - a factory option for the post WWII airplanes. |
19 September 2014 |
|

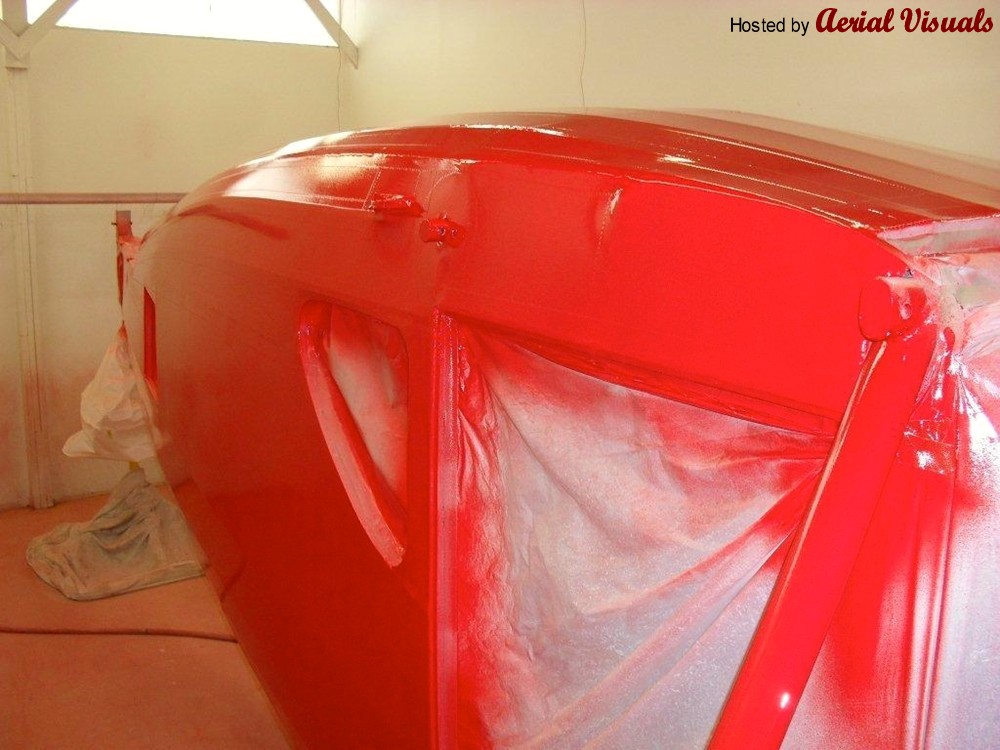
Photographer: Jamie Treat
Notes: The door panels, cowling, windshield surround, and battery access door will all get their trim in a subsequent paint booth session. The extensive protective measures for the openings in the fuselage paid off, not one drop of paint got on the interior or the woodwork. |
20 September 2014 |
|

Photographer: Jamie Treat
Notes: The fuselage out of the paint booth and in the curing room. Low humidity, no fluorescent lights, clean. It sits there for a few days before rolling down the street to the restoration hangar, where all the small panels will get fitted and masked. |
20 September 2014 |
|

Photographer: Jamie Treat
Notes: Jamie is not the only one working on Fred. He has been assisted by a variety of friends and neighbors, his lovely and generous wife, his son, and of course, his two dogs. Here is one of them checking out Freds paint job. |
25 September 2014 |
|

Photographer: Jamie Treat
Notes: A new battery access door being fitted. The old one was a bit rough and did not close properly, so here is the replacement being fitted prior to alodine dip, prime, and paint. The Ranger powered F-24 had the battery located behind the cabin to compensate for the higher weight of the Ranger engine versus the Warner. Warner powered aircraft had the battery located forward. Built as an F-24W, Fred was converted to Ranger power very early in his life - the logbook entry documenting the conversion has a bit of dry humor and says words to the effect of: Aircraft converted to Ranger power after number of engine failures exceeded owners patience. Somehow, I have a feeling such verbiage would not go over very well these days, but it certainly gives the airplane character. On a related note, Fred is one of a handful of surviving F-24s to have ALL his logbooks back to Day One at the factory. |
2 October 2014 |
|

Photographer: Jamie Treat
Notes: The top of the instrument panel with the distinctive post WWII hump. This intricate piece of sheet metal work had to be painted in the aircraft trim color and faded into the interior color for the instrument panel. |
|
|
Brad Donner reports (21 September 2014): I am happy to report that most of Fred is painted! All the major components - wings, tail, fuselage - plus the gear, wheel pants, fairings, and cowlings are done. There are a variety of small panels (doors, battery access, boot cowl, top cowl) that require a final fit to the fuselage before they get masked and painted. Each of these panels require extra attention because each has both the red base color and the trim color, so the fit has to be perfect for the trim lines to work out. With its high parts count and intricate woodwork, the Fairchild 24 is almost as labor intensive to restore as a Beechcraft Staggerwing! Once all the small panels are fitted and painted, the airplane heads for final assembly. This is often the longest and most frustrating part of a full restoration - the airplane looks done, but it still needs final wiring, avionics installation, control rigging, engine installation, completion of fuel and oil systems, glass installation, etc, etc. Despite the length of the to do list, Fred is still on schedule to make some of the antique airplane events late in the 2015 season. |
|
|
Markings Applied: Fred
Note by Mike Henniger, Sr. Editor (21 September 2014): Mr. Donner as asked me to note that although the airframe has not yet been marked as such it will be known as Fred. He has a second Fairchild 24 project which will eventually be known as Ethel in reference to the 1951 to 1957 TV series I Love Lucy. The characters Fred and Ethel were friends of the main characters Lucy and Ricardo. |
13 October 2014 |
|

Photographer: Jamie Treat
Notes: Fred is off the shop dolly and on his own gear for the first time in several years. The struts have been overhauled to new limits and all the hardware is new. If you look VERY closely behind and to the left of Freds firewall, you will see he has some fine company. Jamie is rebuilding the tail feathers of Kyle Franklins Waco Mystery Ship! |
15 October 2014 |
|

Photographer: Jamie Treat
Notes: Horizontal stabilizer going on. This beautiful piece of woodwork has been rebuilt, covered, and painted and is now being attached to the aft fuselage. Fit and alignment were spot on. |
15 October 2014 |
|

Photographer: Jamie Treat
Notes: Vertical fin installed. Next will be the control surfaces, then we move to the forward fuselage and install the windshield and boot cowl, both intricate and time consuming installations. |
20 October 2014 |
|

Photographer: Jamie Treat
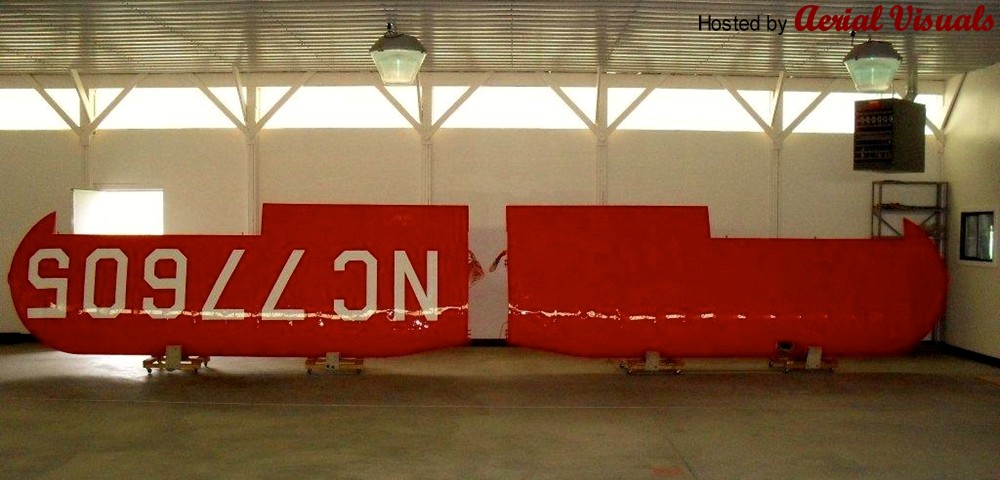
Notes: Its all in the details! The first time I saw the inspection hole layout for the F-24 wing, I was shocked at how many inspection openings were called for in the blueprints and curious how they would align with the large N numbers. Here is my answer. The alignment and detail are very intricate. Each of these inspection covers has part of the base red color AND part of the Diana Creme trim color. Now I understand why many restorations utilize smaller registration numbers - the smaller numbers dont require this attention to detail on the inspection covers. No one ever said authenticity was easy, but its worth the effort. |
2 November 2014 |
|

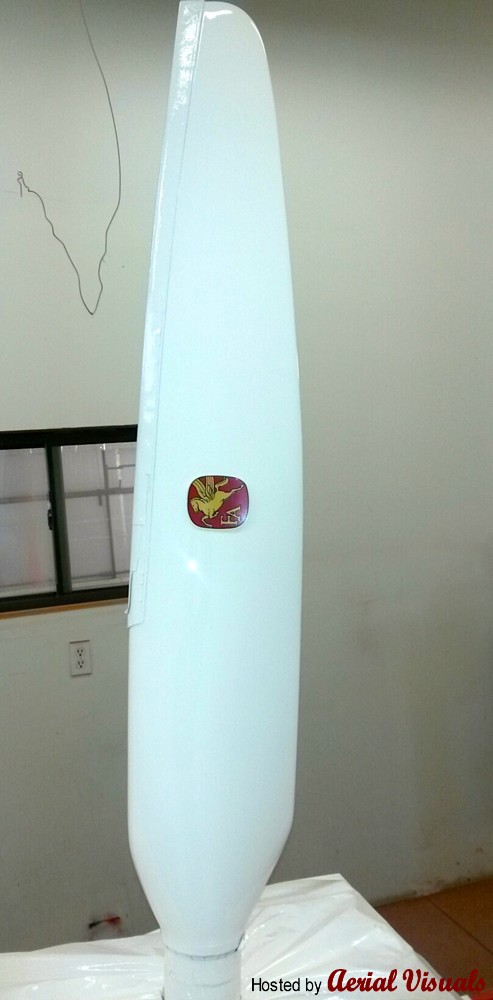
Photographer: Jamie Treat
Notes: Fred left the factory with an Aeromatic prop, so now he is getting another one. I never liked the way the black Aeromatic blades looked on the red Fairchilds, so this Aeromatic is getting blades that are finished in the Diana Creme trim color. We will finish them off with Fairchild logos in the red base color and red tips. |
2 November 2014 |
|

Photographer: Jamie Treat
Notes: Another concession to modernity is Cleveland wheels and brakes. The original Hayes wheels and brakes suffer from parts availability and reliability issues, so Fred has some new shoes. Here are the wheel halves getting finished in the Diana Creme trim color. |
3 November 2014 |
|

Photographer: Jamie Treat
Notes: The rudder and elevator undergoing final attachment. These components were trial fitted to the fuselage at different times during the rebuild to verify fit and alignment. It seems unnecessarily repetitive when youre doing it, but it pays big dividends when it all goes together perfectly after it has been painted. |
3 November 2014 |
|

Photographer: Jamie Treat
Notes: Another view of the tail with the elevator and rudder attached and rigged. The next step is to hook up the elevator trim system. |
5 November 2014 |
|
Photographer: Jamie Treat
Notes: Here is one of the Aeromatic prop blades after being painted in the Diana Creme trim color and getting the Fairchild logo applied. The metal tipping for the leading edges of the blade is masked in this image and will be left in its natural metal finish Yes, the red in the logo also matches the red base color. OCD makes for some nice airplanes. |
5 November 2014 |
|
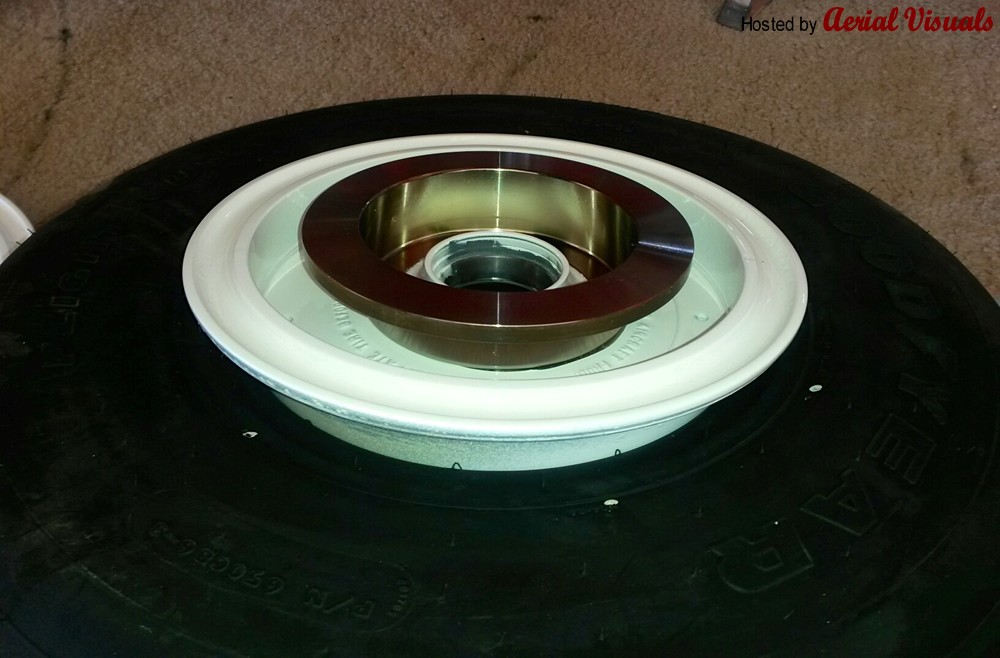
Photographer: Jamie Treat
Notes: Shoes and socks. In an earlier post, I mentioned that Fred was getting Cleveland wheels and brakes. The standard Cleveland application for an F-24 uses Cessna 310 wheels, calipers, pads, and discs. Some of the first owners who installed this particular Cleveland kit reported it was too much brake; I heard isolated reports of F-24s ending up on their noses or backs following heavy brake application. Freds conversion uses Cessna 310 wheels mated to a smaller disc and caliper that fit inside the recess of the wheel. This clean installation provides the right amount of braking and does not require cutting the wheel pants to accommodate the Cleveland disc and caliper. |
8 November 2014 |
|

Photographer: Jamie Treat
Notes: 200hp Ranger mounted. New mount bushings, freshly inspected mount, spin-on oil filter, new hoses and cables, and new exhaust are included, as well. Note the wheels and brakes - seen in a previous photo - are on the gear. |
13 November 2014 |
|

Photographer: Brad Donner
Notes: Aeromatic blades ready for mating to the hub. |
|
|
Michael Martindale comments (November 2014): I had the good luck to meet Brad in Afghanistan a few years ago. He is a great pilot and loves aviation history. At the end of what was often an endless stream of long days, Brad would light a cigar and show us pictures of his Fairchild project. He would describe it as his old beater of an airplane, but his passion for it was obvious. Never one to forget his roots or his ambitions, Brad is an ideal custodian of a historic airplane. Thank you for allowing me to comment on his project - it looks great and I cant wait to see it fly. |
1 December 2014 |
|

Photographer: Jamie Treat
Notes: Final installation and rigging of the pitch trim system. The elevator trim tabs, like the flaps, are referred to in the Fairchild manual as being of composite construction. And like the flaps, they are not fiberglass or any other modern material. They are wood frames skinned in aluminum. |
1 December 2014 |
|
Photographer: Jamie Treat
Notes: Another view of the elevator with the trim tab installed and rigged, as well as a nice view of the white navigation light on the trailing edge of the rudder. The rudder is of steel tube frame construction and the opening for this small light is very intricate. |
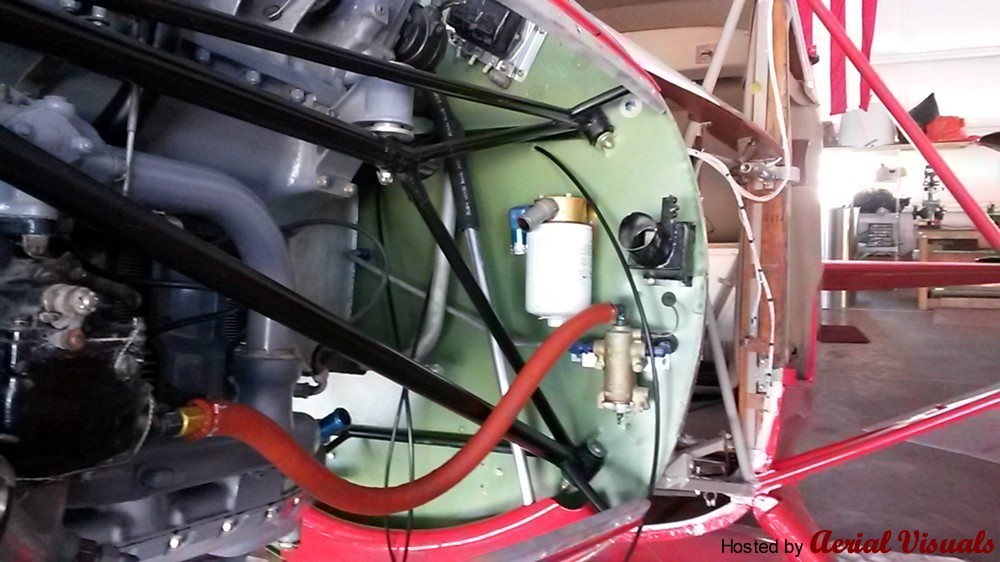
4 December 2014 |
|

Photographer: Jamie Treat
Notes: Engine installation continues. Here is the 200hp Ranger installed with the nose bowl and cowling attachment rails. Also visible is the hump that attaches to the top of the instrument panel and the boot cowl. |
4 December 2014 |
|

Photographer: Jamie Treat
Notes: Left side showing another view of the cowling attach rails and nose bowl. Fire sleeve hoses are next to be installed. |
4 December 2014 |
|

Photographer: Jamie Treat
Notes: Right side showing the oil tank and cooler installation. The prop hub is also visible here. Fred will be test flown with a Sensenich or Flottorp propeller before we try out the beautiful Aeromatic. |
19 December 2014 |
|

Photographer: Brad Donner
Notes: I will test fly Fred with the old Flottorp propeller. This is largely a safety precaution, the Aeromatic prop seen in the dossier requires a set-up procedure that is fine tuned in flight. Rather than test fly a new prop AND a newly restored airplane, I will test fly with the Flottorp and install the Aeromatic after I put a few hours on the airframe and engine. This means the Flottorp needs a shop visit for inspection and possible refinish, which means I need to build a crate for shipping the prop. Here are some photos of that effort. The crate started out as a 4x8 sheet of plywood at Home Depot that was cut to form two sides, a top, a bottom, and two end caps. The top and bottom were drilled to match the bolt pattern of the Flottorp hub and all thread was used to connect the top and bottom of the crate via the holes in the hub. This method immobilizes the prop inside the crate to prevent damage during transit and potential rough handling. Here is the resulting pattern. |
19 December 2014 |
|

Photographer: Brad Donner
Notes: Uprights (scrap 1x3 pine) installed to make the top and bottom pieces parallel and to create a surface for attaching the sides and end caps. |
19 December 2014 |
|
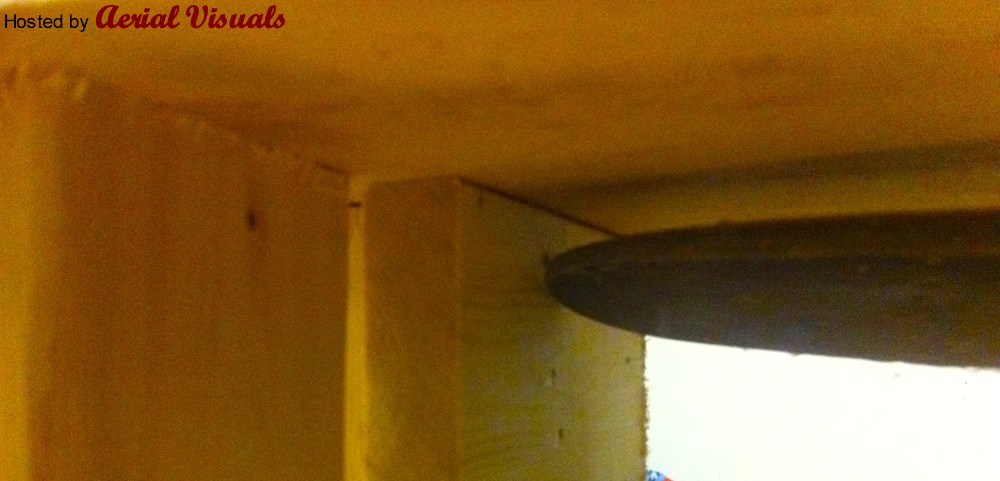
Photographer: Brad Donner
Notes: Doublers were installed to protect the tips. |
19 December 2014 |
|

Photographer: Brad Donner
Notes: Then everything gets a light sanding and a coat of varnish. Probably overkill for a prop crate, but props for the Fairchild are expensive and worth protecting while in transit. |
2 January 2015 |
|
Photographer: Jamie Treat
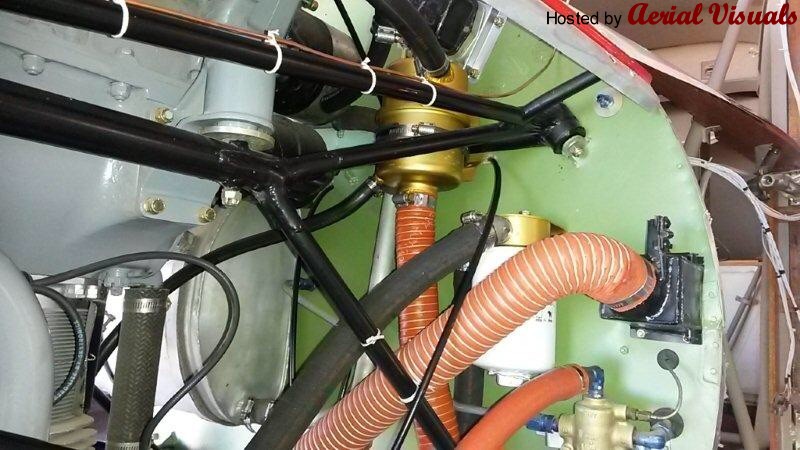
Notes: Getting the engine installation just right. The modern spin on oil filter was initially placed at the bottom center of the firewall. This location interfered with the low pressure lip that directs cooling airflow over the aft cylinders, so the oil filter had to move. Here it is after relocation with some of the modern fire sleeve hoses visible. Wiring and more fire sleeve hoses will be installed next. |
9 January 2015 |
|
Photographer: Brad Donner
Notes: January 10, 2015 will be wing hanging day! Today is therefore preparation day. Fairchild 24 wings are HEAVY and BIG so everything has to be in place and the operation carefully planned. |
9 January 2015 |
|

Photographer: Brad Donner
Notes: More preparation for the wing hanging operation. |
10 January 2015 |
|
Photographer: Jamie Treat
Notes: Right on schedule and done in a safe and professional manner, Freds wings are installed, along with the struts. |
10 January 2015 |
|

Photographer: Jamie Treat
Notes: Fit and alignment are perfect. |
10 January 2015 |
|

Photographer: Brad Donner
Notes: Split flaps also installed on 10 January 2015. |
17 January 2015 |
|

Photographer: Brad Donner
Notes: Aeromatic F-220s are getting scarce, so obtaining viable spares for Fred and Ethel has been a priority. These two beauties with magnificent documentation were recently added to the inventory. Many thanks to my aviation friends for making them available to me at a reasonable price - they have gone to a good and appreciative home. |
20 January 2015 |
|

Photographer: Jamie Treat
Notes: Post WW II airplanes left the factory with either a Directional Gyro OR an Artificial Horizon. Fred was bought new by the University of California - we never could determine the campus - for aerial mapping. They optioned him for BOTH a Directional Gyro AND an Artificial Horizon, resulting in a unique panel layout. Here is the sheet metal overlay as it left the factory with fresh paint. |
26 January 2015 |
|

Photographer: Brad Donner
Notes: Another crate. Every time I ship a fragile or rare part in a cardboard box, it gets destroyed in transit. I have had enough, so now all my important parts get shipped in purpose built wood crates. This one is for the boot cowl that came off the airplane, which will be used as a pattern for a new one. |
2 February 2015 |
|
Photographer: Brad Donner
Notes: Airwolf spin on oil filter and air-oil separator installation are done. The Airwolf vacuum pump goes on next. The Airwolf products are high quality, well supported, and well reviewed. |
2 February 2015 |
|
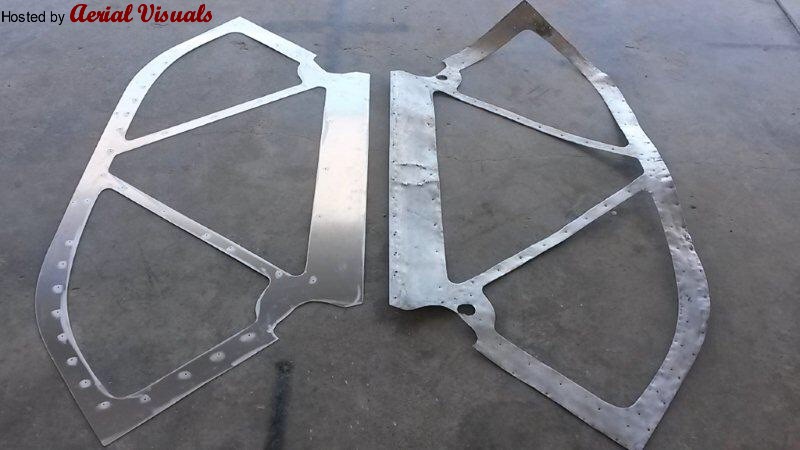
Photographer: Jordan Sitta
Notes: Many thanks to Jordan Sitta and Jamie Treat for producing this replacement windshield frame cover. As you can see, the old one was a little rough, so here is a new one prior to rolling for curvature. |
20 March 2015 |
|
Photographer: Jamie Treat
Notes: For the last several weeks, the Bellanca - NC86916 - has been getting a lot of attention. As if to demonstrate his worthiness and potential jealousy, Fred has emerged on the scene with a freshly refurbished propeller. Earlier posts document the rebuild of the Aeromatic F220, the decision to test fly with a more conventional prop, and the crating of this prop - which was thought to be a Flottorp. Well, it is not a Flottorp. A careful inspection and removal of the black finish by craftsman Herb Robbins of the Wings of History Museum in San Martin, CA, revealed this prop to be a 1940s vintage Sensenich in excellent condition. Herb lovingly inspected this prop and then refinished it with period correct varnish. Here it is today installed on Fred and getting ready for engine runs and eventual test flights. Many thanks to Herb, the Wings of History Museum, and all the craftsmen who brought this gorgeous prop back to service. |
6 December 2015 |
|

Photographer: Jamie Treat
Notes: Fred is getting some very expensive shoes. Original Fairchild wheel pants are elaborate affairs - a bunch of stamped and welded soft aluminum with many compound curves. The devil in the details was how to make modern Cleveland wheels and brakes fit under the existing wheel pants without altering them. The solution was difficult and expensive, but worthwhile - we had to turn down the inner radius of the Cleveland wheels to accommodate the calipers. Then we had to get it all FAA approved, which was the most difficult part. |
26 March 2019 |
|
To Apogee Investments Llc, Hurst, TX keeping c/r N77605. |
26 May 2022 |
|
To Cameron L. Grossl, Georgetown, KY keeping c/r N77605. |
2023 |
|

Photographer: Cameron Grossi |
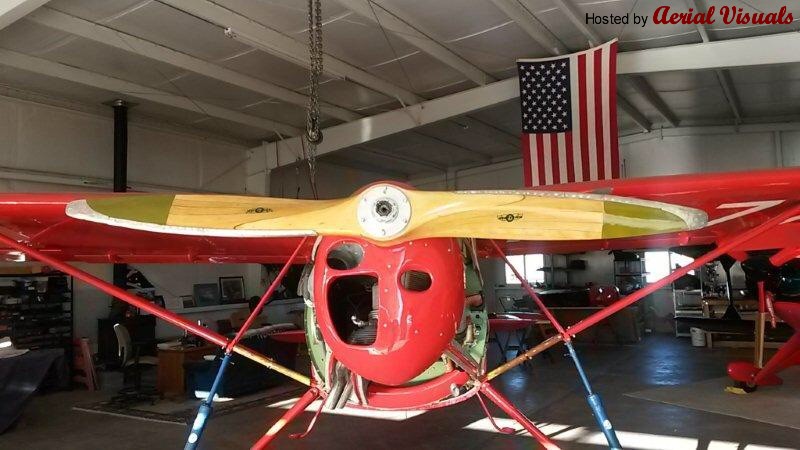
1 September 2023 |
|

Photographer: G R Dennis Price
Notes: At Antique Airfield, Blakesburg, Iowa |
|
 | | This airframe dossier is based on
unreviewed imported data.
If you can verify the documented history or add to it with additional text and/or photos please feel free to do so by using the upload tool and the history editor. |